|
|
|
Porsche, and the Porsche crest are registered trademarks of Dr. Ing. h.c. F. Porsche AG.
This site is not affiliated with Porsche in any way. Its only purpose is to provide an online forum for car enthusiasts. All other trademarks are property of their respective owners. |
|
|

  |

| Chaznaster |
 May 29 2023, 06:33 PM May 29 2023, 06:33 PM
Post
#1
|
|
Member  Group: Members Posts: 325 Joined: 22-November 15 From: Concord, MA Member No.: 19,389 Region Association: North East States |
I put my engine back in today for the first time.
It went pretty well but have a gap between the tin and seals on the left and right towards the front. It is about 1/2" on the L and 3/8" on the right. I installed brand new seals from 914Rubber but they do not bridge the gap. The tin is also pretty far above the lip in the seal where it should contact the tin. Not sure about the metal staples/clips that came with the seals - are they used to close gaps like the ones in the pics? Or ... another thought: the engine looks like it might be a little too far forward. Moving it back should help close the gap, at least where the curve is. Should/ can I loosen the bolts holding on the crossbar and the big bolts where the transmission attaches to the mounts and pull it all back a bit? Thanks for your thoughts on this ... 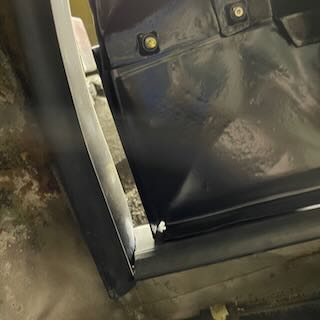 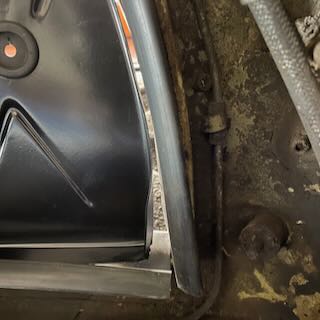 |
   |

 
|
| r_towle |
May 29 2023, 06:48 PM
Post
#2
|
|
Custom Member Group: Members Posts: 24,705 Joined: 9-January 03 From: Taxachusetts Member No.: 124 Region Association: North East States |
The forward or rearward position is easiest to spot at the transmission mounts to the chassis.
Those should sit freely in the middle of the u-channel in the transmission. The rubber gaskets are not always made correctly and require you to twist the rubber to get it to hook up to the tin. |
|
|
|
| 914werke |
May 29 2023, 07:53 PM
Post
#3
|
|
"I got blisters on me fingers" Group: Members Posts: 11,248 Joined: 22-March 03 From: USofA Member No.: 453 Region Association: Pacific Northwest |
Make sure your Eng bar & trans mnts are square. You can bend out the tin "flange" slightly to allow the seal to grab
|
|
|
|
| gonzo54 |
May 29 2023, 08:45 PM
Post
#4
|
|
Orange Crush Group: Members Posts: 259 Joined: 10-May 19 From: Seal Beach, CA Member No.: 23,112 Region Association: Southern California |
I have encountered the same problem after my recent enigne rebuild and installation. Rubber seals are from the same vendor with new motor mounts and transmission mounts. I thought the motor mounts might not be the correct P/N or height but the P/N is correct. So is the engine to low for the tin to hook up the the seals?
|
|
|
|
| Front yard mechanic |
May 29 2023, 09:00 PM
Post
#5
|
|
Senior Member Group: Members Posts: 1,321 Joined: 23-July 15 From: New Mexico Member No.: 18,984 Region Association: None |
Drill a small hole in the tin right through the rubber seal and zip tie it into submission
|
|
|
|
| nditiz1 |
May 29 2023, 10:04 PM
Post
#6
|
|
Senior Member Group: Members Posts: 1,238 Joined: 26-May 15 From: Mount Airy, Maryland Member No.: 18,763 Region Association: MidAtlantic Region |
^This is what I did. Worked great.
|
|
|
|
| bkrantz |
May 29 2023, 10:04 PM
Post
#7
|
|
914 Guru Group: Members Posts: 8,361 Joined: 3-August 19 From: SW Colorado Member No.: 23,343 Region Association: Rocky Mountains |
Or get some paper clips and do this. Once in place you can remove the handles.
Attached thumbnail(s) 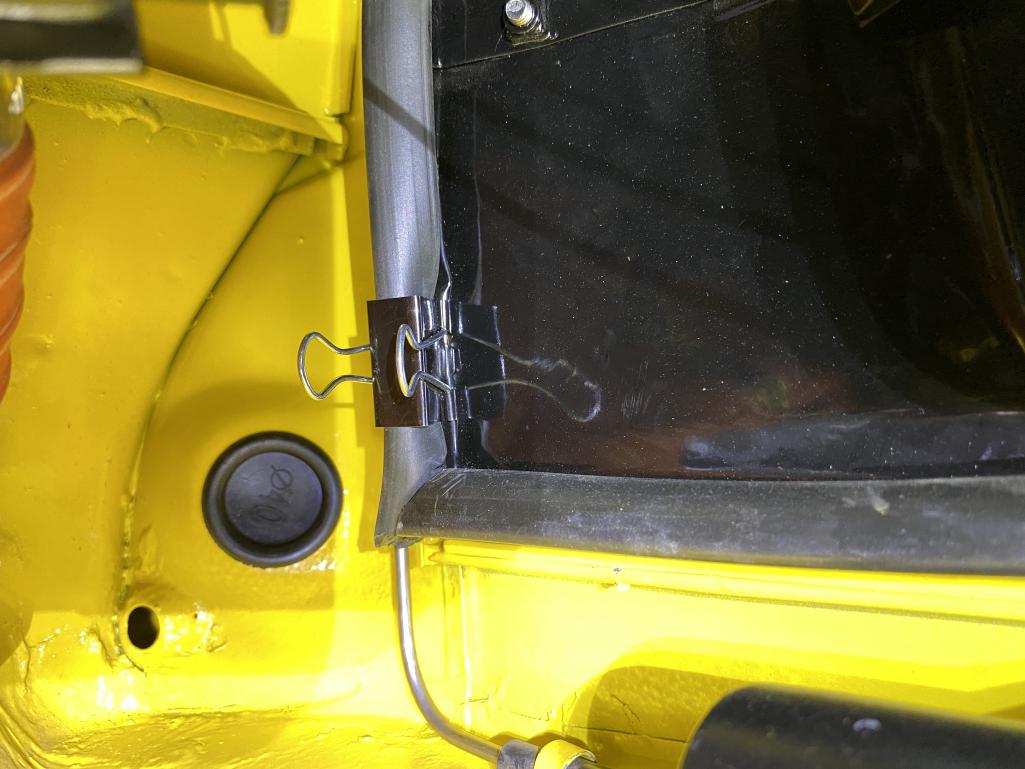
|
|
|
|
| Dave_Darling |
May 29 2023, 11:23 PM
Post
#8
|
|
914 Idiot Group: Members Posts: 15,161 Joined: 9-January 03 From: Silicon Valley / Kailua-Kona Member No.: 121 Region Association: Northern California |
QUOTE(Chaznaster @ May 29 2023, 05:33 PM)  Not sure about the metal staples/clips that came with the seals - ... They may be to keep the front corners closed. There were hog-rings in the corners on my car when I bought it. --DD |
|
|
|
| Mikey914 |
May 30 2023, 09:28 AM
Post
#9
|
|
The rubber man Group: Members Posts: 12,767 Joined: 27-December 04 From: Hillsboro, OR Member No.: 3,348 Region Association: None |
The hog rings were what factory did. We supply them with our complete set of seals now.
|
|
|
|
| JamesM |
May 30 2023, 01:06 PM
Post
#10
|
|
Advanced Member Group: Members Posts: 2,082 Joined: 6-April 06 From: Kearns, UT Member No.: 5,834 Region Association: Intermountain Region |
The tin originally had a curve to it. If it has been bent/hammered flat it can create a gap like this.
|
|
|
|
| rgalla9146 |
May 30 2023, 03:26 PM
Post
#11
|
|
Advanced Member Group: Members Posts: 4,743 Joined: 23-November 05 From: Paramus NJ Member No.: 5,176 Region Association: None |
the corners were not only hog ringed they also had a fat blob of black rubber/
putty for better seal. The pics are an un-touched 6 Attached thumbnail(s) 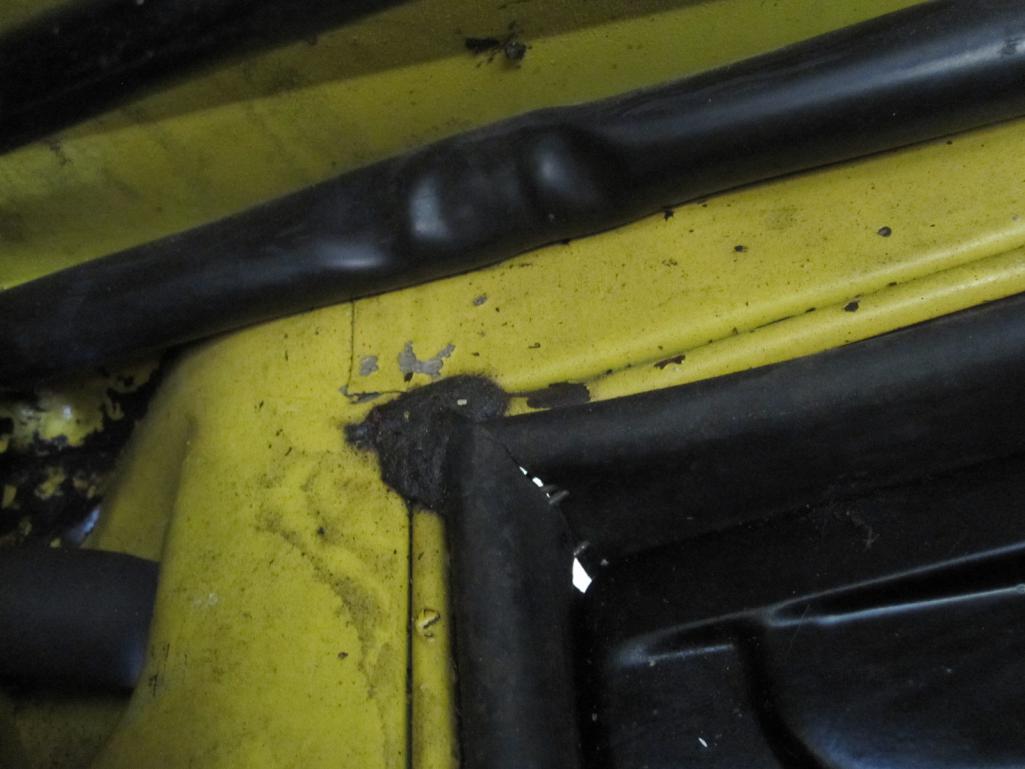 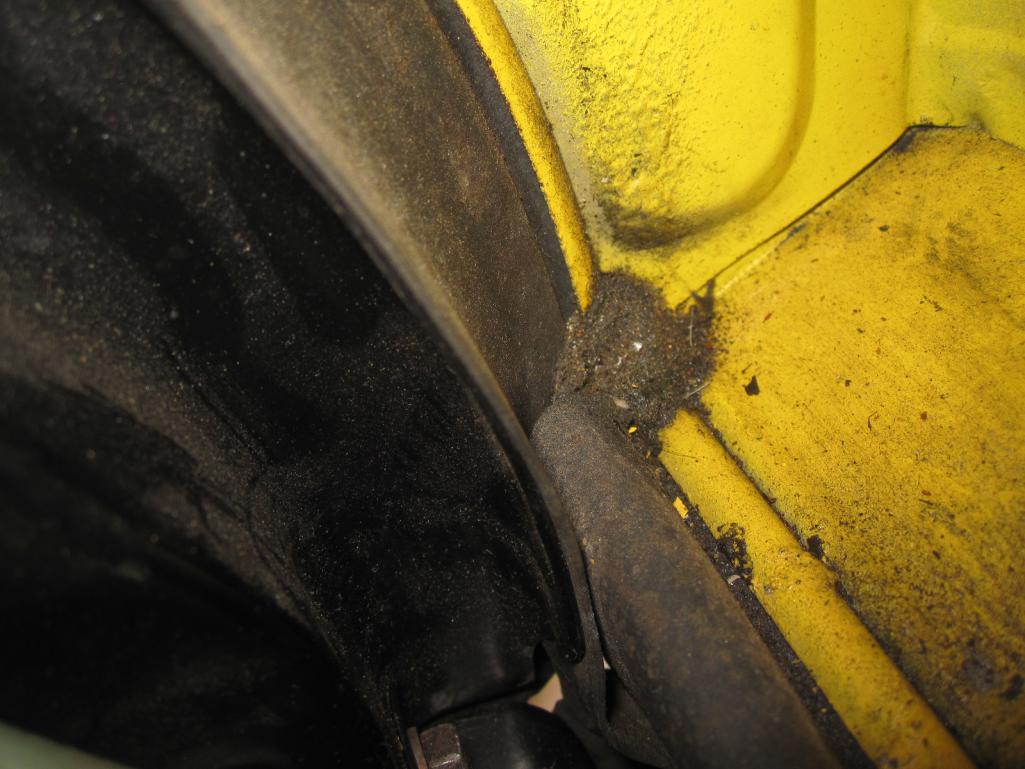
|
|
|
|
| Chaznaster |
May 30 2023, 06:53 PM
Post
#12
|
|
Member Group: Members Posts: 325 Joined: 22-November 15 From: Concord, MA Member No.: 19,389 Region Association: North East States |
Thanks for all the great insights on this!
I looked into moving the engine back but everything seems to line up right, including the transmission mounts to the car and to the transmission itself. The big bolt is pretty much centered. So no go there ... although I still think the engine sits a little too far forward because the tin on the other end, over the junction between the engine and transmission, is a bit more into the engine bay than I would have thought it should be. The tabs on that piece of tin were not straddling the transmission housing when I started - the whole thing was pushed backwards - so do not have a mental image of what that is supposed to look like. The crossbar itself looks fine - the ends are not bent. No damage from hitting a speed bump that I can see. And I cannot see anything wrong with the mount points on the car. I am chalking it up to the tin being flattened at some point. I might have even added to that problem unintentionally when I prepped it for powder coating. It's pretty much impossible to bend it down when in the car unless I hang from it and I do not want to do that. For now, I am working with the binder clip approach to keep everything closed. Might switch to some of those semicircular spring steel clips with the pointy ends that are used for gluing up picture frames. When the engine is next out, I'lll see about bending the tin down. Again, thanks much for the help. |
|
|
|
|
1 User(s) are reading this topic (1 Guests and 0 Anonymous Users)
0 Members:

|
Lo-Fi Version | Time is now: 10th May 2025 - 01:23 AM |
Invision Power Board
v9.1.4 © 2025 IPS, Inc.