Help - Search - Members - Calendar
Full Version: Pploco Sti-defiling a 914
914World.com > The 914 Forums > 914World Garage
Pages: 1, 2
pploco
I figure its high time to start sharing my subaru conversion progress with y'all. I'm new to the 914 and have been silently lurking on the site gleaning as much knowledge as possible. I'm a few months into the conversion, and decided to gather up my pictures and start sharing.

Several years ago I shoe-horned a turbo subaru 2.0 into a 73 beetle

73 Subaru Conversion

I had an ABSOLUTE BLAST flogging that poor little thing. But I quickly learned that the bug was not a very safe platform for a 300hp subaru engine. I could dust anything off the line and actually pull the front wheels off the ground. But it was a scary handful on the freeway. I ended up selling it and have missed that angry little blue bug ever since.

I've always loved the 914, and have watched from the fringes as they creep up and up in value. So when two basket cases popped up locally on craigslist, I decided it was time to jump back in and do a proper conversion

Lucky for me, I found these on a 2'fer one deal:

74:

IPB Image

73:

IPB Image


The PO had stuffed a Pontiac v6 in the 73. He totally scabbed the conversion together - especially the cooling. No radiator fan, square tubing for coolant lines - its ugly. Not surprising, he cooked the motor. Then let it sit outside and rust. The interior is in excellent shape, but the rockers, longs, hell hole, and door jams are pretty bad.

The 74 had been stripped and "prepped" for paint. His reality of "prepped" boarders on insanity. He was planning a LS conversion but didn't get any further than stripping it down and spraying it with john deere yellow barf.gif

It basically came home in boxes. But, I picked them both up for $1500, then sold the 1.7 and trans from the 74 for $1K. Not a bad deal at all.

I'm planning to use the 74 as my base. It has some hell hole issues and a few rust spots, but the longs are in pretty good shape and the pan is mostly solid. I'll use the 73 for an interior parts car.

Now for a motor porn teaser - This is what I put together last weekend happy11.gif

IPB Image
pploco
Project plans:

This is going to be an evolving post as the project progresses. I would describe myself as a weekend warrior with fake-sick-to-work in the garage once in a while tendencies. So my timeline is wide open as to when I'll likely have this wrapped up. I do have to hurry though. My 13 year old son has decided he loves to weld and fab and he is eyeing the '73 as his first car. If I'm going to have interior and various parts, I've got to move quickly. Since the driving age in Idaho is 15, I figure I've got less than 2 years to be at least driving this beast.

My goal is to have the motor and trans ready to mock in, then they'll go on a shelf for the fabbing and rust repair. I'll then prep and paint. Having done a few projects like this in the past - there is nothing worse than having to cut a freshly painted car to fit something for the conversion. I want paint and interior to be the last things I do.

Admittedly, I can be a bit scattered on these projects because of the way they have to share space on my priority list with family, work, and other important commitments. So I try to only tackle jobs I know I can finish in the time and budget that I have available - if that makes sense. So while there might appear to be madness to my approach, I promise there's a method to the madness.

My plans (as of May 2019)

Motor:
2008 EJ257 STI block bored +.5mm
Timesert head bolt anchors
2008 OEM STI crank with nitride coating
OEM STI rods with ARP rod bolts
King racing main and rod bearings
Manley forged and skirted pistons
ARP head studs
Heads - 2004 OEM with single AVCS
- new OEM valves and guides
Stock exhaust and uppipe
Turbo - Cobb 20g
ECU - 2004 STI stock with Cobb AP tuner
Harness - 2004 STI stock, custom by Jeff Robenolt @ AutoVentures LLC

Cooling
Toyota Celica GT radiator
Fozenboost Water/Air intercooler

Transmission
'04 WRX 5 speed

Body
Color:still undecided - narrowed down to porsche red, black, olympic blue
GT flares(?) still on the fence here. I love the GT flares on a black or dark blue, but not on red or light blue

Misc Conversion
Coldwater cradle and trans hanger
JDM STI clutch master
Celica GT or MR2 shifter
Zero Decibel bell hanger shift linkage
Subaru STI fuel assembly/pump
Heat and A/C
pploco
More of the '74:

IPB Image


IPB Image

IPB Image


IPB Image

IPB Image

IPB Image
pploco
I wanted to see what the PO's "fix" to the hell hole looked like. So I grabbed my wire wheel and started cleaning. Before long, bolt heads appeared - what the....

IPB Image

I should also mention that this was under about a 1/2 inch of what looked like roofing tar. WTF.gif
pploco
Sorry folks... I have a whole slew of photos to share, but google isn't cooperating. Stay tuned...
Retroracer
Welcome to the forum!! Looking forward to seeing the build develop.

Looks like the PO sold you the little-known early IKEA version of the 914; it arrived flat-packed, and you simply bolt it together.

Not really.

But seriously, that looks terrifying. You have some challenging body work ahead....!

- Tony

tmessenger

Those FI parts in the front trunk may have some value, just saying we have a buy/sell forum.

Tim
Cairo94507
welcome.png It took me forever to figure out the photo-thing here. But welcome and have fun. beerchug.gif
mepstein
welcome.png
Freezin 914
welcome.png
76-914
welcome.png Oh, Welcome to the Dark Side too! beerchug.gif
Maltese Falcon
Welcome thumb3d.gif welcome.png
burton73
Thanks for taking us on your trip with you.

Bob B welcome.png
EdwardBlume
welcome.png

Looks like fun!
strawman
I’m in Boise for a family thing this weekend, so I had a chance to meet Scott and see his project. This is going to be a great “sleeper” car, and Scott is a nice addition to the 914 community. Best of all, his young son is a car guy (he’s welding up a buggy!) and wants to eventually build the spare/parts 914 — so Scott is getting the next generation into our cars. Scott also has great knowledge of Subaru engines. Keep an eye on this build!!
krazykonrad
welcome.png

This looks like its going to be a great build. Get in touch with @michiganmatt. He just did a killer build that is similar.

Konrad
pploco
QUOTE(strawman @ Apr 7 2019, 11:28 AM) *

I’m in Boise for a family thing this weekend, so I had a chance to meet Scott and see his project. This is going to be a great “sleeper” car, and Scott is a nice addition to the 914 community. Best of all, his young son is a car guy (he’s welding up a buggy!) and wants to eventually build the spare/parts 914 — so Scott is getting the next generation into our cars. Scott also has great knowledge of Subaru engines. Keep an eye on this build!!


Thanks for swinging by on Saturday, it was great to pick your brain for a bit!
pploco
All right, lets kick this off properly. No 914 rustoration would be complete without a trip down to hell (hole). The PO waxed poetic on all of his extensive work to fix the hell hole. He said that he had "installed" patch panels and sealed them with rust inhibiting treatment. I think he mentioned POR15.

Once I got the car in my garage, I started cleaning things up and sorting through the parts, I noticed there was something a little off with the "patched" areas. After a little wire wheel action, I see this:

IPB Image

Then this:

IPB Image

IPB Image

IPB Image

IPB Image

IPB Image


Pictures don't do this custom work justice. This patch was a good inch thick with
what looked like fiber filler and tar.


IPB Image

IPB Image


Before I got too crazy with the cutting and welding, I decided to check the door gaps to make sure. Everything checked out. But I was worried that the PO had done similar repairs in other areas and covered them up with the lovely Walmart tractor yellow.

I went around the car and tested door jams, trunks, fenders, sail panels - all the nooks and crannys that might have other surprises waiting. I did find a nice bondo monument to middle school dropout bodywork in the rear trunk, and a few small cover ups on the sail panels, but overall this is a pretty solid car.

Oh, and if anyone is interested I have a set of slightly used hell hole patch panels that I'd sell for super cheap.

IPB Image
mepstein
Actually, one of mine was similar with spray foam, copper sheet and tar. headbang.gif
pploco
I started cutting back to find solid metal. Luckily, the long wasn't bad, and I probably cut more out of the inner fender well than I needed. There was definitely one annoying little corner in the firewall that was a booger to clean up.

IPB Image

It was nice to see that the inside of the long wasn't completely rotten. I probed with my chisel and body hammer and found a little spot at the bottom of the long.

IPB Image

But there was solid metal to work with. Sorry for the shady picture..

IPB Image

I was relieved to see some factory primer peeking through the sides and bottom. Once I vacuumed all the rust and flake out, it looked pretty good overall. I didn't get a good picture, but just in front of the firewall toward the front of the car is all factory primed metal. I'll have to open up the bottom and weld in a patch, but it should be minimal. My plan is to open it up, clean and scrape and then treat with phospho and some frame wax.

pploco
I've got the hell hole fixed. I've removed the engine tray tin, and have been cleaning things up to prep and treat with zerorust, but wanted to wait until it warmed up a little. I decided to switch gears a little and focus on the motor and mockup.

I picked up a 2004 STI motor from an auction for 1200 bucks plus shipping. The description said it was part of a theft recovery and was missing the turbo. There wasn't a lot of detail, other than 104K miles on the clock and a receipt in the glove box that the timing belt had been changed at 90K miles. I knew it might end up being a box of rocks, but I figured that all the peripherals - manifolds, brackets, oil pan, etc would be worth what I paid. I decided to roll the dice and hope that the heads and internals weren't junk.

I used Uship to find a cheap carrier, and for 300 bucks UPS delivered the motor to my driveway. Pretty good deal if you ask me.

IPB Image

The motor didn't look too bad, but it smelled terrible. I can't really describe the stank, but it was bad. It smelled like water had mixed with oil and festered for several months. Damn! probably a blown head gasket. Oh well, I thought, I would at least use it for some mock up.

IPB Image

Ian (Coldwater) lives in Boise, and so I called him up and begged him to hook me up with a cradle. BTW, he said he's still making these - they just take longer because he's super busy these days.

IPB Image

About the same time, I picked up a '99 RS transmission. More on that later...

IPB Image


Mocking the motor up, I verified that I would need to cut some of the trunk to fit the 20G turbo, the clutch slave, and starter.

I wanted to brace the two rear towers, strengthen the corner that connects to the long, and have something to fasten the trans pitch stop to. I plan to go water/air IC and route the charge pipe similar to DBCooper's setup, over to the driver's side.

IPB Image


IPB Image

I think this turned out pretty good - even though I used a ghetto homemade metal brake. Basically pipe wrenches, a vice, a 2x4, and a piece of angle iron.


Oh yeah.... and some motor porn:

IPB Image
pploco
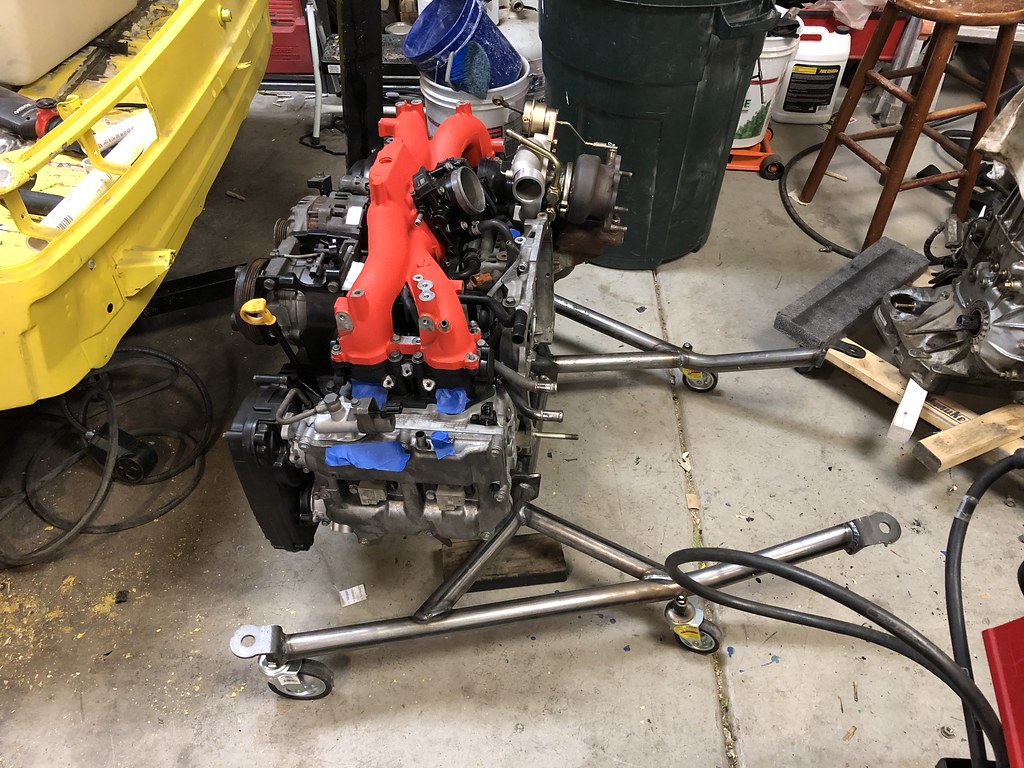
I built the shortblock a couple of weeks back. I was in a bit of a hurry and got the heads torqued, cams installed, AVCS installed, and the valve covers on. As I was cleaning up my bench, I noticed a ARP washer sitting under a rag... headbang.gif

I panicked a little, threw a wrench, and practiced a few farm words. While building the block, I'd had a little scare when I was torquing one of the head studs when the timesert shifted a little and made a popping sound. I was sure I had just stripped my newly built block, so I pulled the head back off and checked everything. Once I realized what had happened and that it was a false alarm, I put everything back together using one of two spare headgaskets I had - but in my fit, I forgot to put one of the washers on. headbang.gif headbang.gif

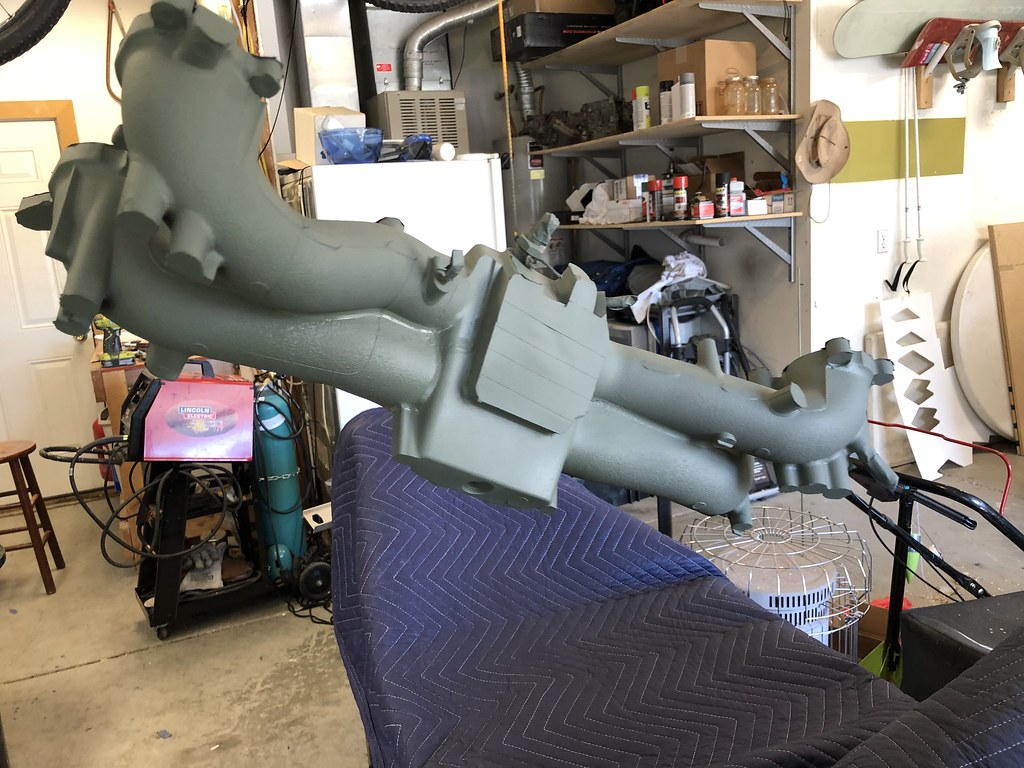
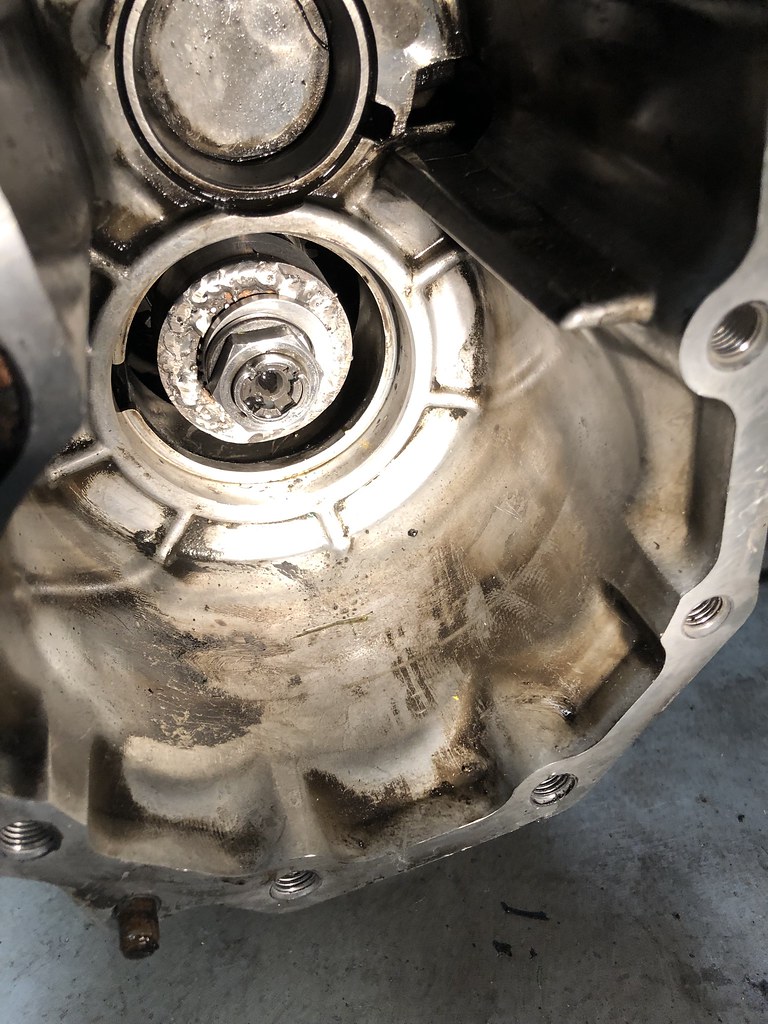
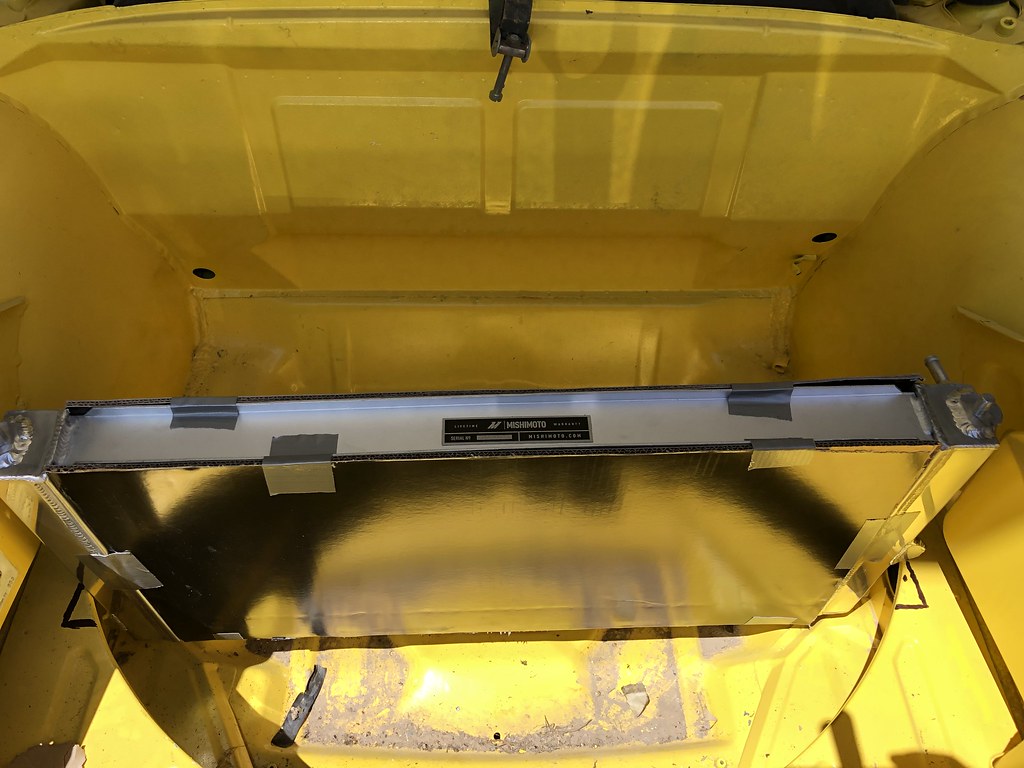
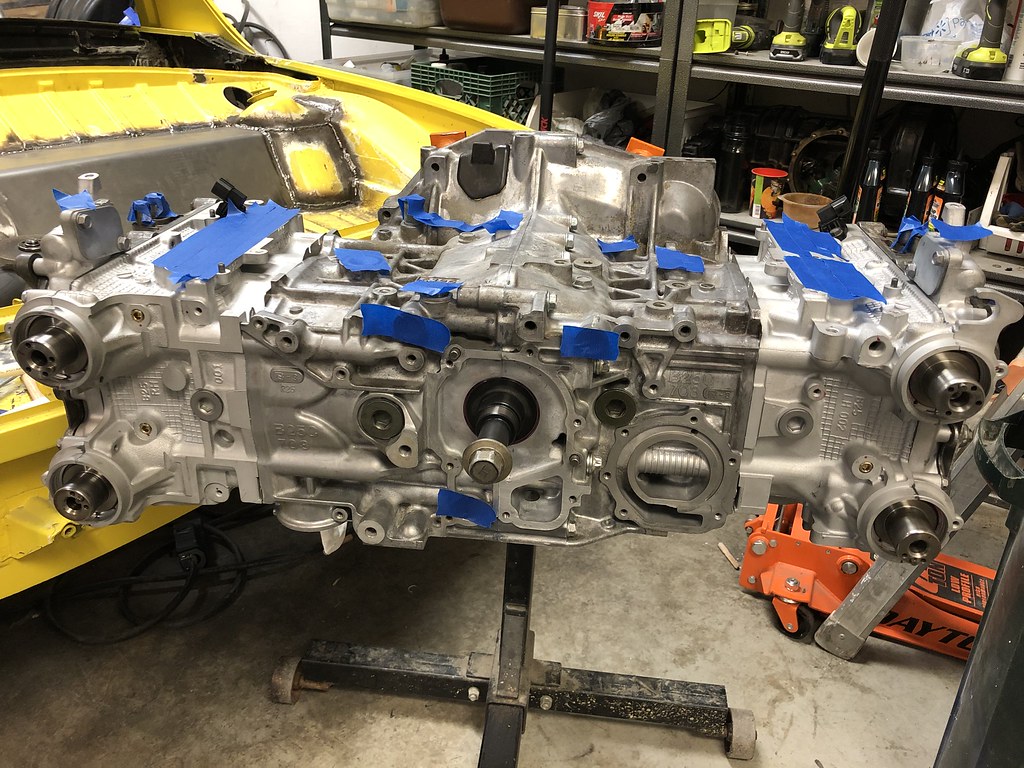
So I spent some time taking the head back off, burning another head gasket, and installing the washer I forgot. While the head was back off, I took a picture for your viewing pleasure.

IPB Image

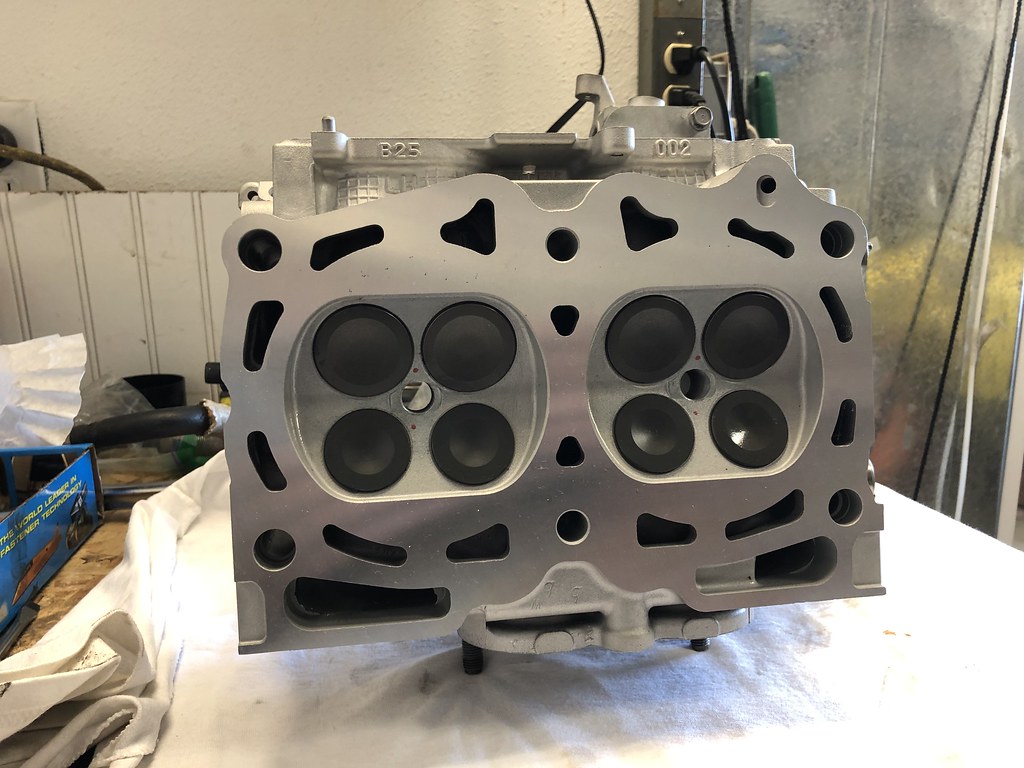
These heads were rebuilt by a local shop with new valves, guides and springs. I wish I had a before picture, because these things were a mess.

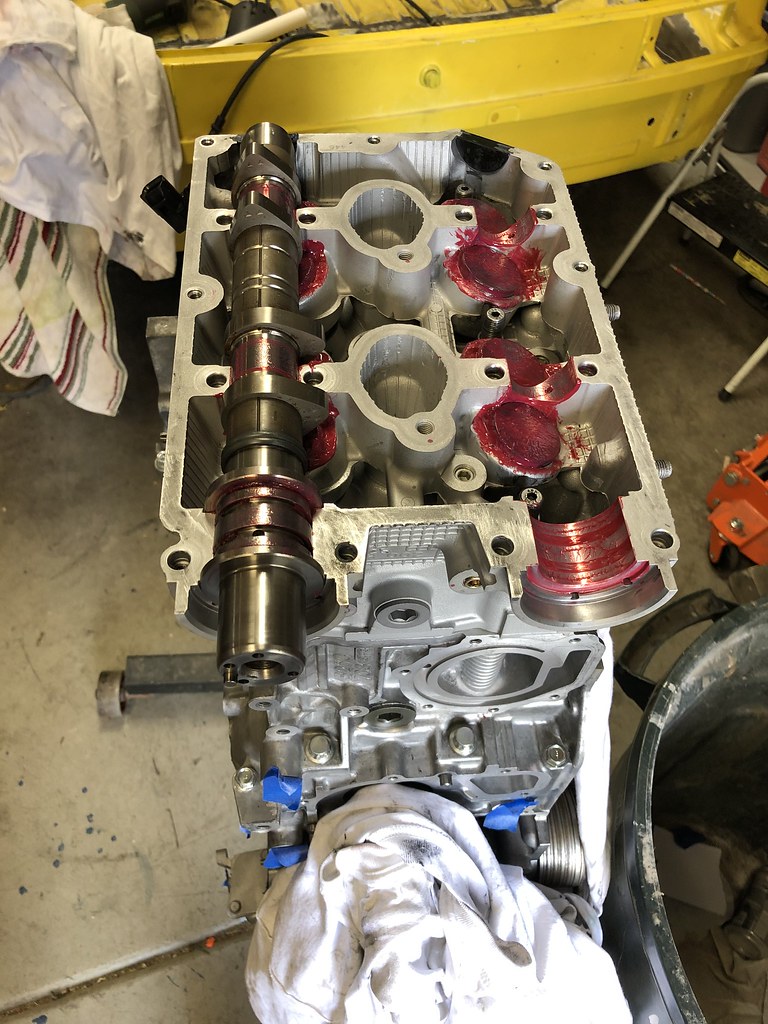
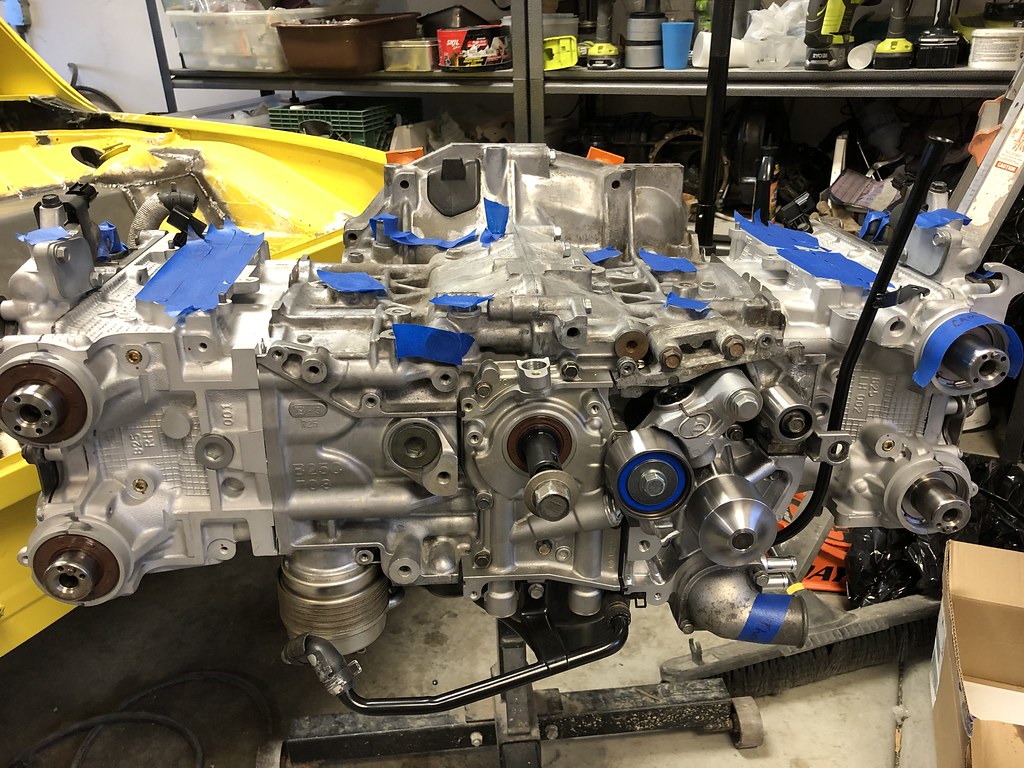
Got the head torqued down AGAIN, with the washer installed, and started installing the cams.

IPB Image

I hate doing things over because of my own stupidity.


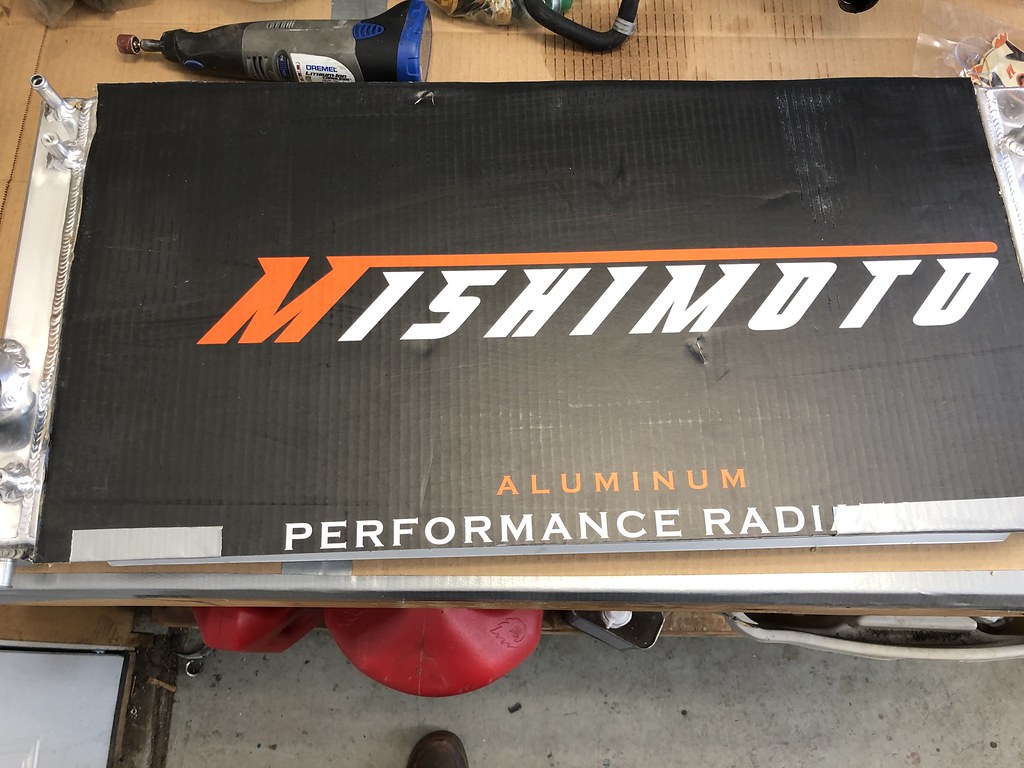
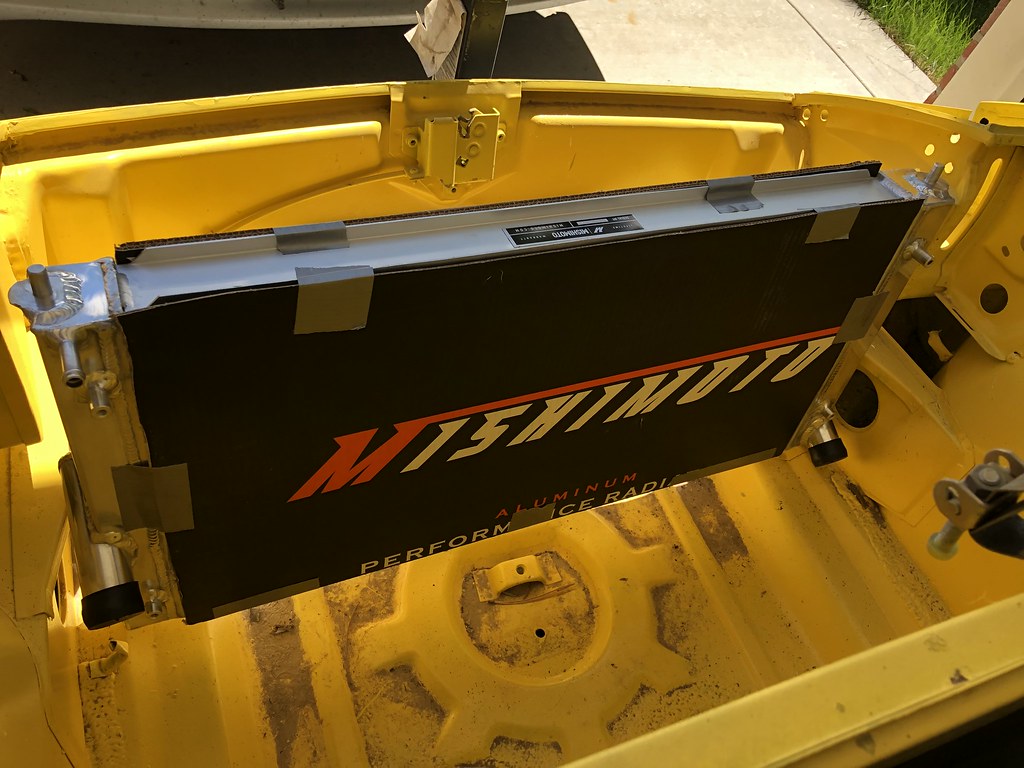
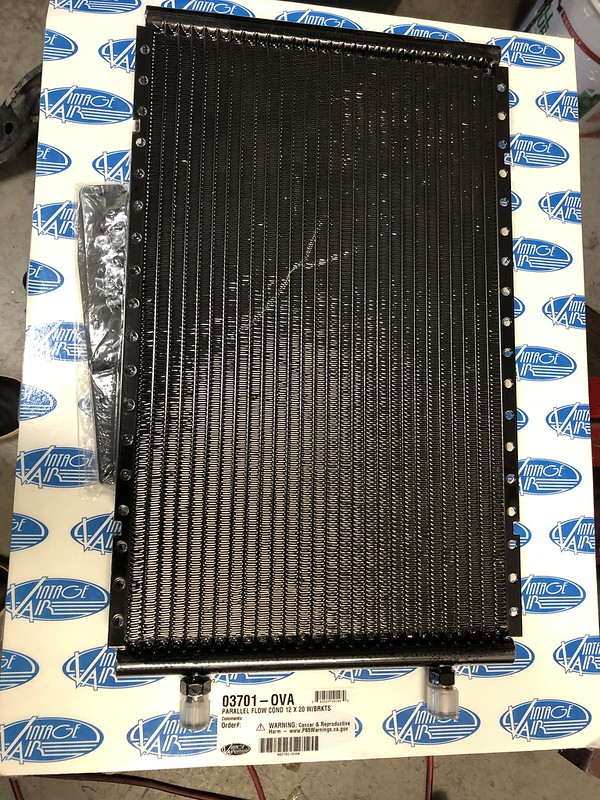
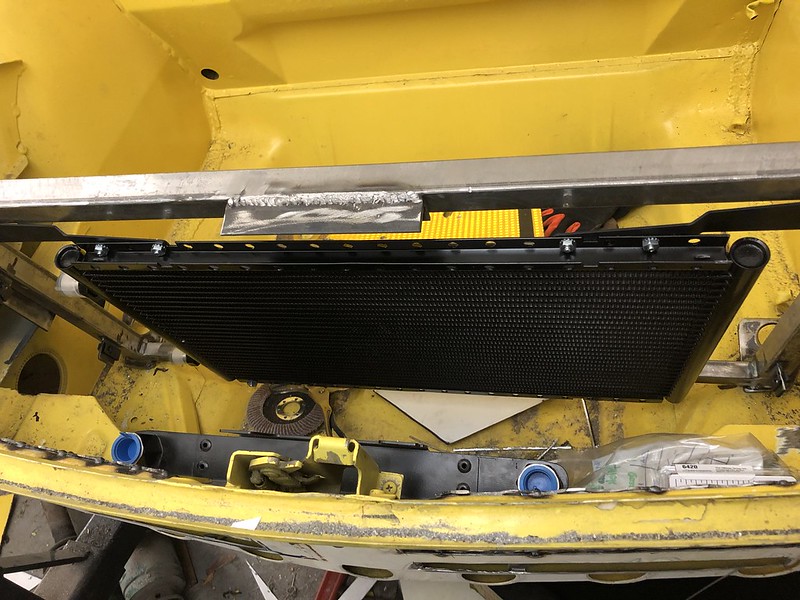
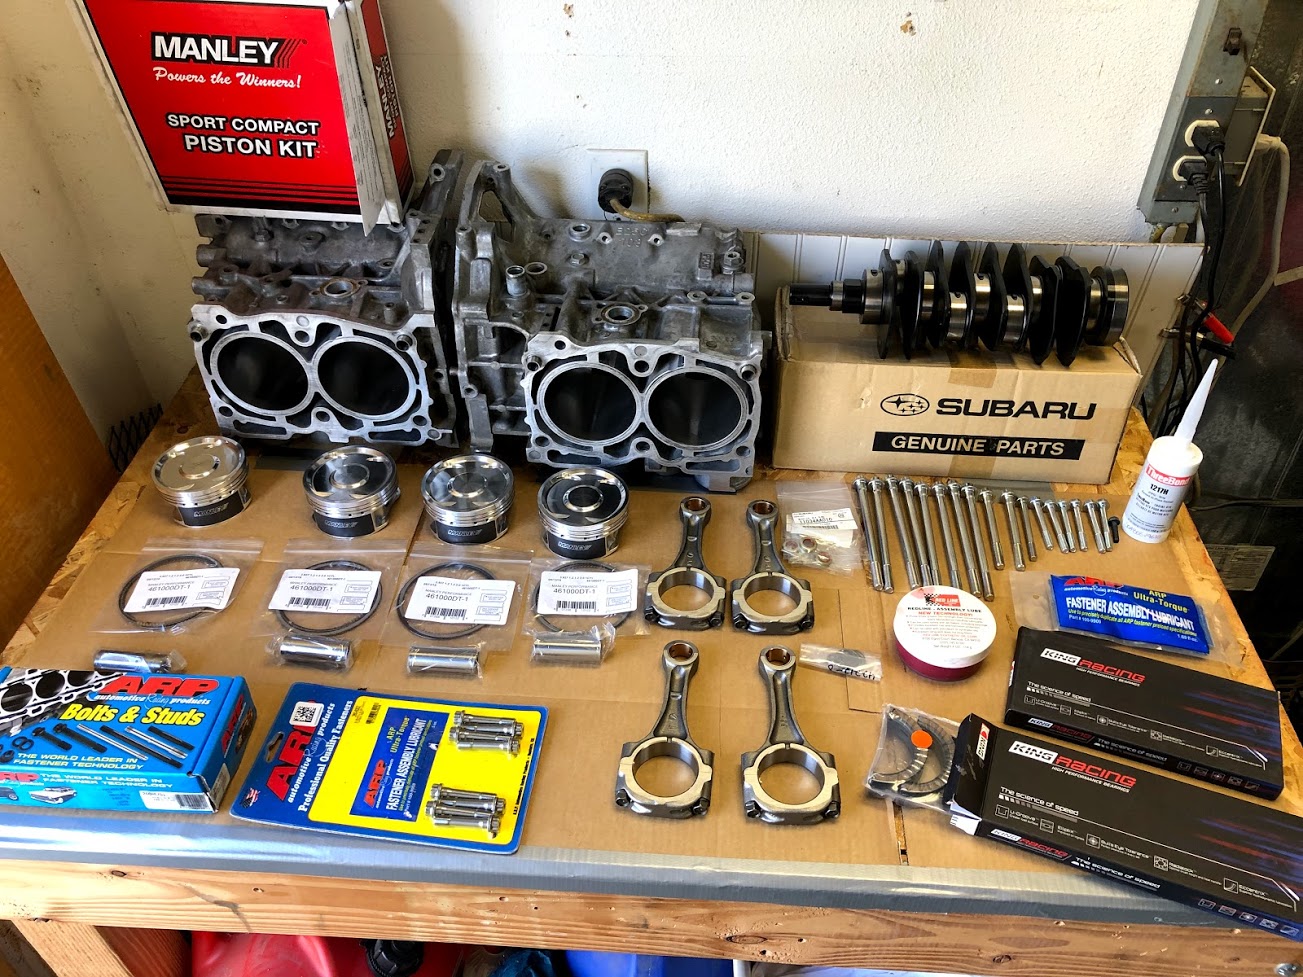
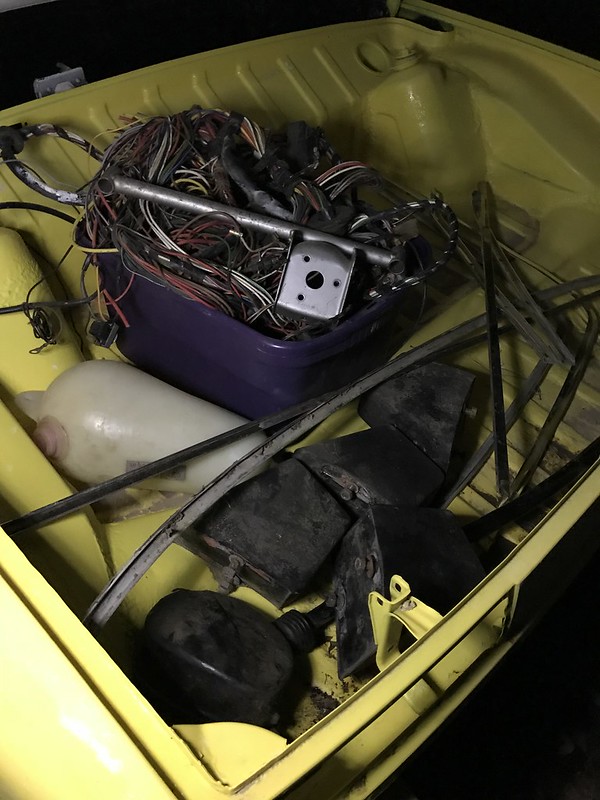
On a brighter note, my weekend started with a box waiting for me on the doorstep smile.gif

IPB Image

IPB Image

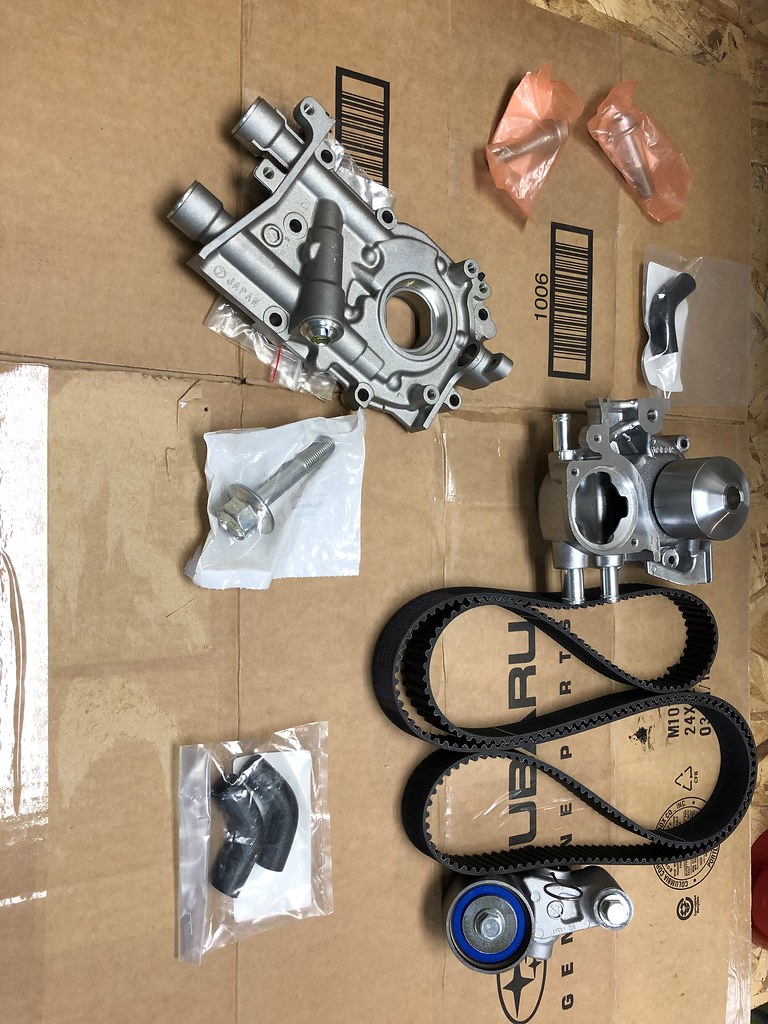
I also got a box from Rockauto that had a timing belt kit with all timing idler pulleys. Fun fact - if you're ever replacing a timing belt or head gaskets on a Subie, its always a good idea to check and possibly replace the idler pulleys. I've had one grenade on me and ruin an engine. I had another one that started going bad and it made the timing belt jump a cog - what a pain that was. You have to be careful on some of the kits that are offered - some are just Chinese garbage. The challenge is that the stealership charges a ridiculous price for each pulley - like $80 bucks each. The OEM timing belt alone is over $100. Truthfully, I don't use anything but the OEM timing belt.

I found a kit that I like from Contitech that comes with a timing belt and all the individual idler pulleys. When you look at the pulleys side by side, the bearings are the same as OEM. The Continental timing belt that comes in the kit is German made. The whole kit was only $121 bucks plus shipping. I can sell the Continental timing belt on NASIOC for $40.


Also a few Subaru motor building tips:

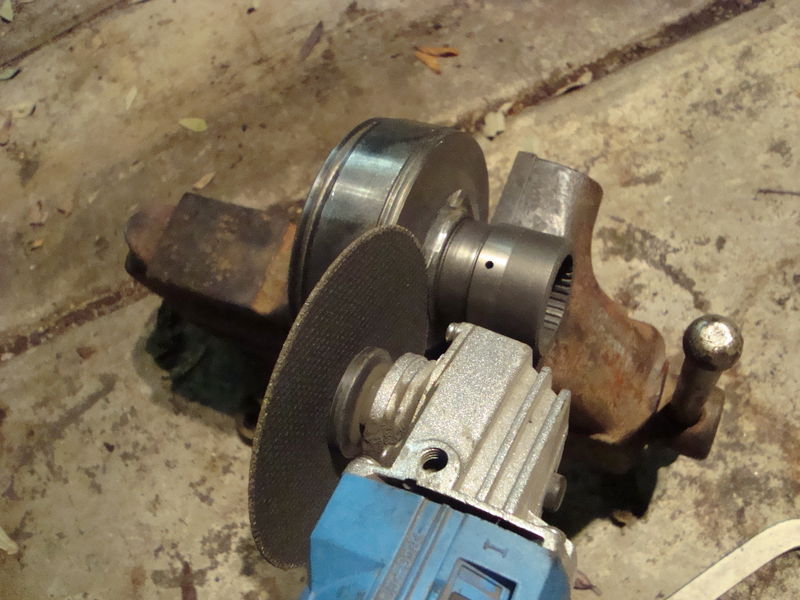
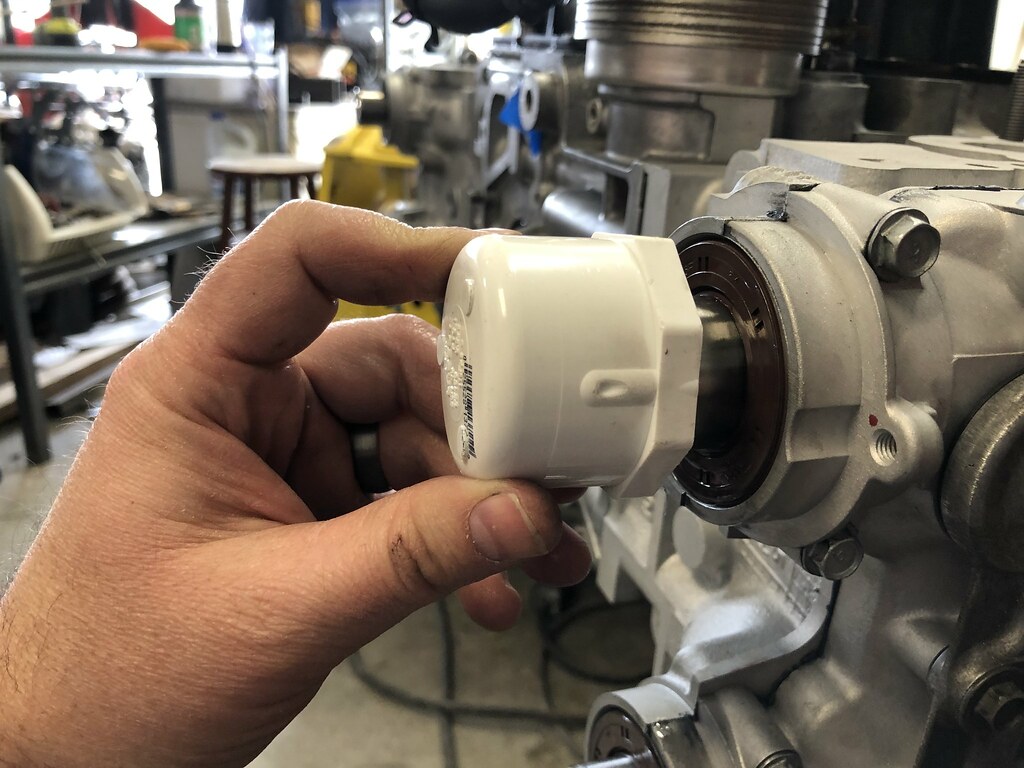
First - when installing cam seals, this is the best/cheapest tool out there. The proper Subaru tool is spendy - this baby costs 80 cents and has a perfect collar that prevents the seal from being driven too far.

IPB Image

Second - 
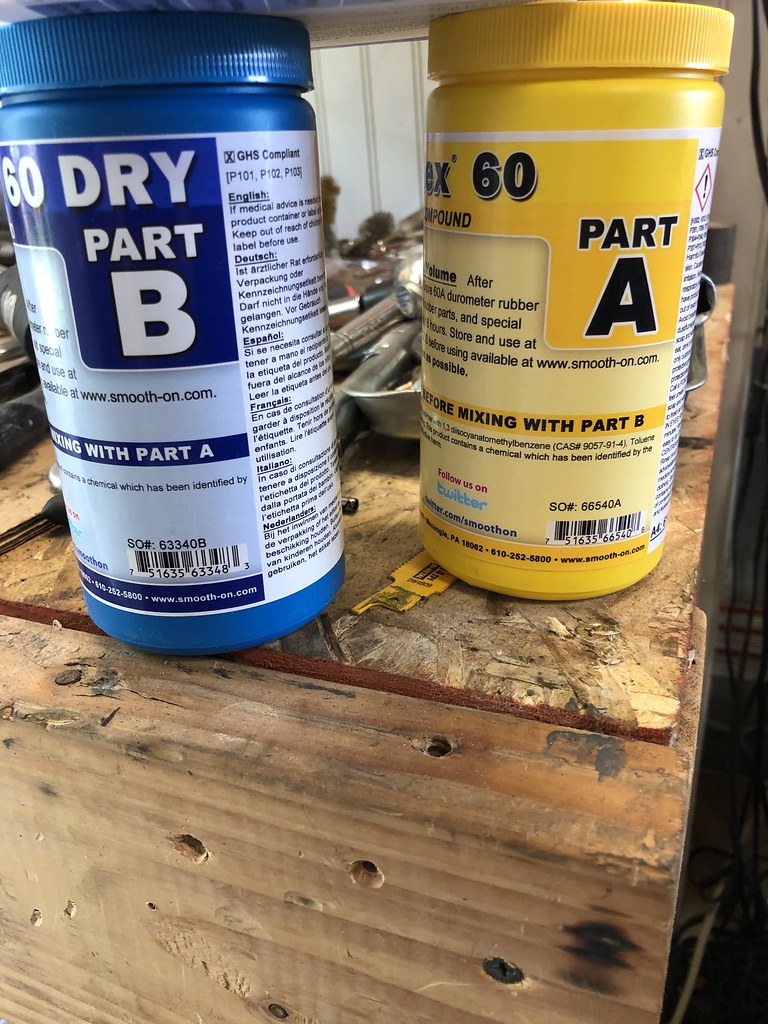
Subaru recommends using a gasket filler when assembling engines. There's a lot of debate here on what to use. Some guys use ultra grey RTV, or Hondabond as an alternative to the Subaru filler. I REALLY like and prefer the Subaru ThreeBond stuff

IPB Image

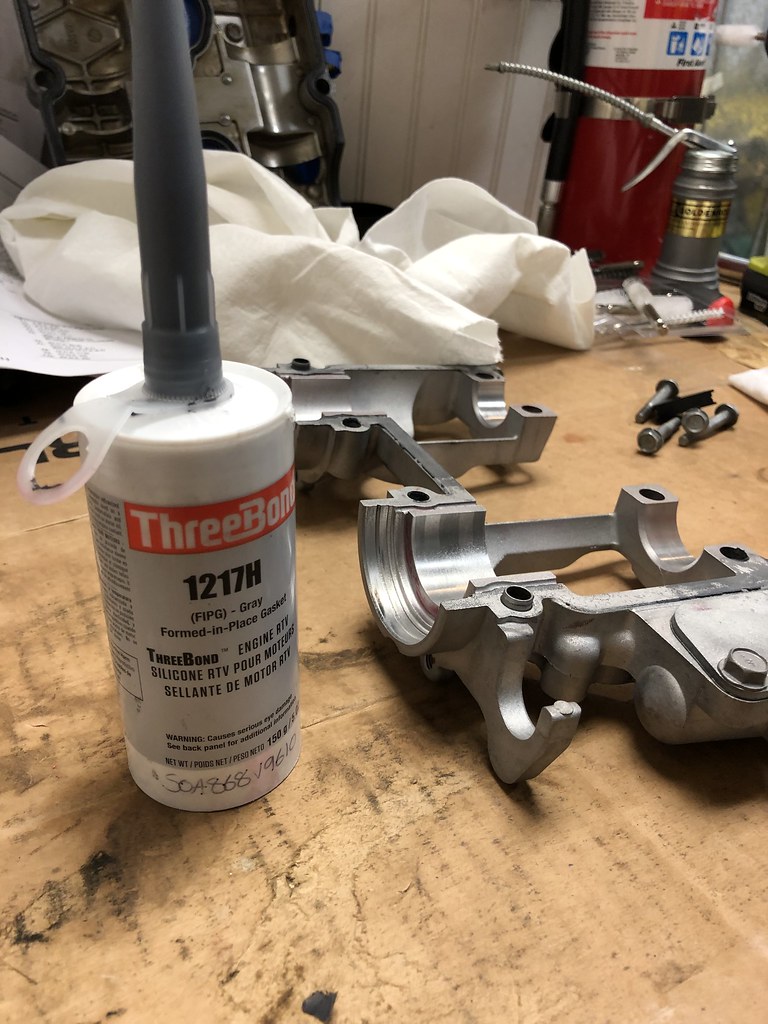
Its much easier to work with than the thick Hondabond, and I've yet to have a motor leak with it. It also cleans up easier - you know if you have to pull the head off cuz you forgot a washer. The only challenge with it, is that it can be kinda runny. You don't have to use a lot, but when you're working around the AVCS cap, there are some oil galleys that are right next to where you're supposed to seal. I use a small ziptie right after torquing the cap to push through the galley and twist around to clean out the filler. If you shine a flashlight from behind the cap toward the front, you can see if there is anything blocking the galley.

IPB Image

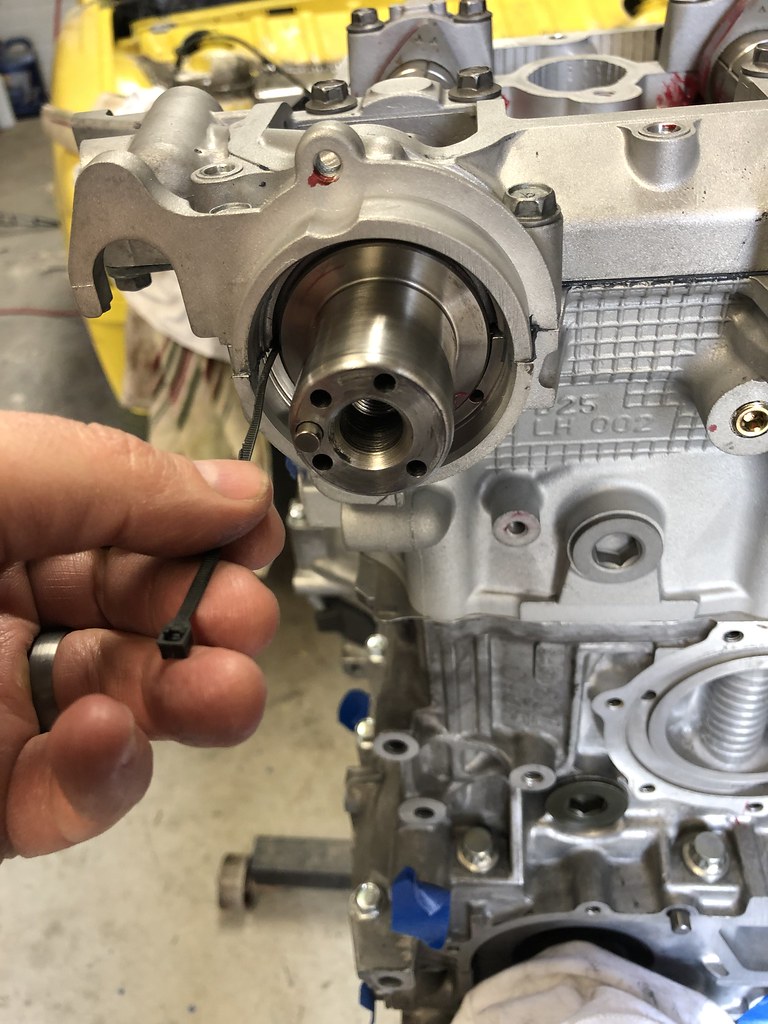
Lets just say I learned this trick at the school of hard knocks - a seized cam is no fun.

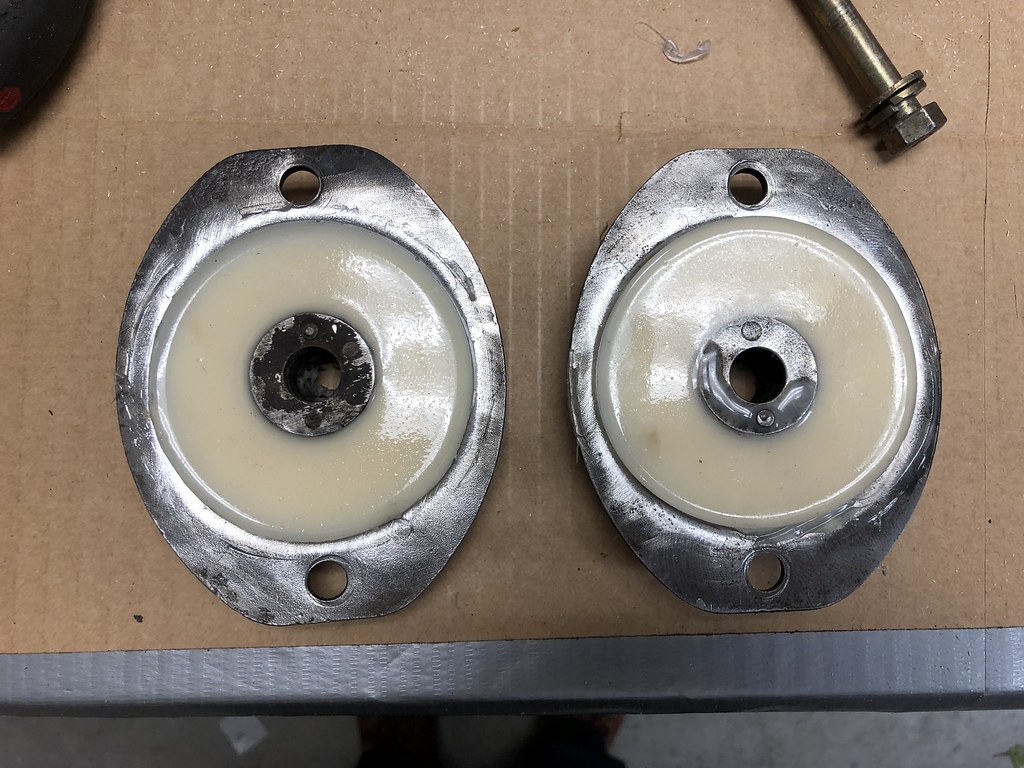
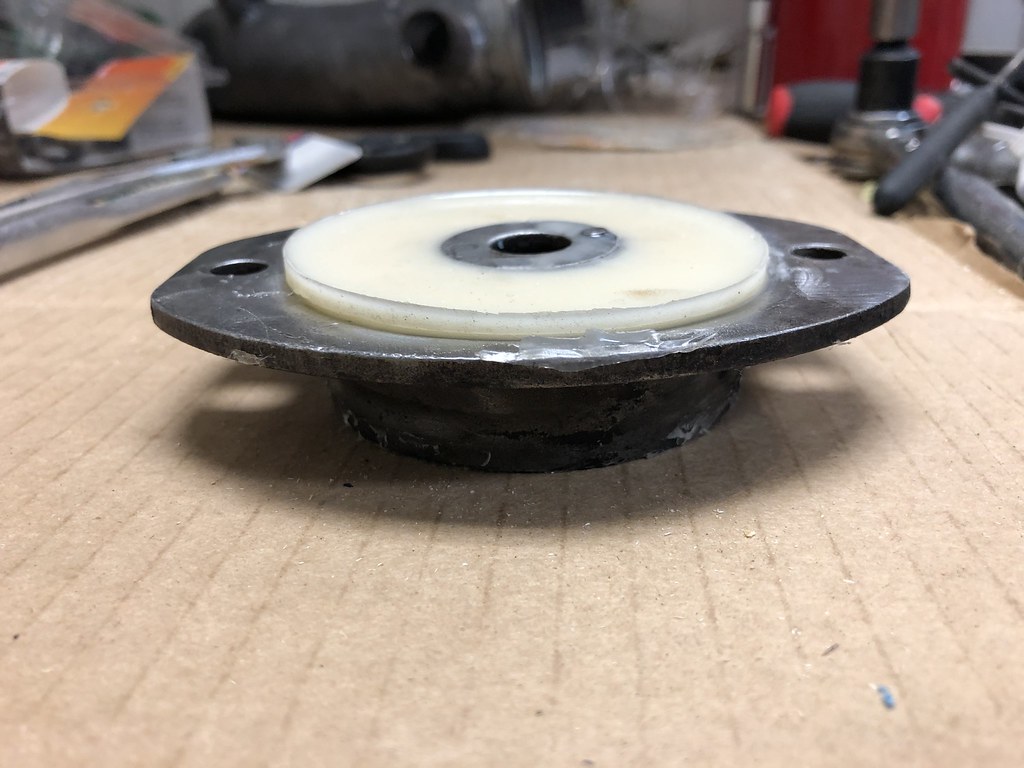
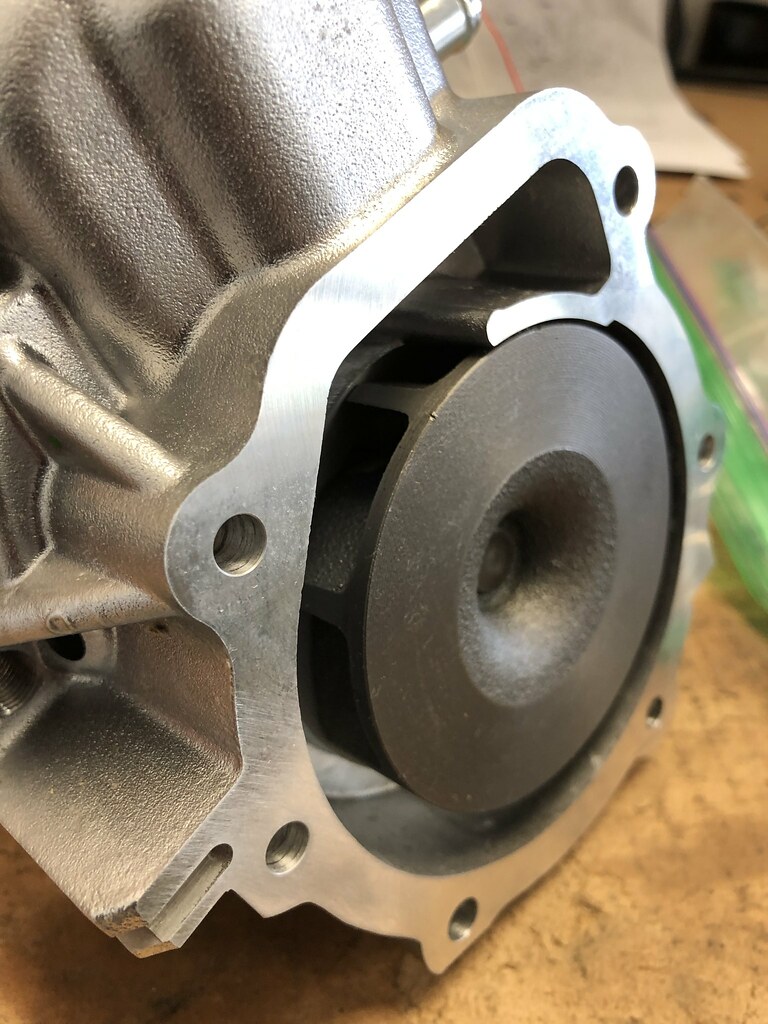
Third - There are two OEM water pumps for the Subaru WRX/STI turbos. At some point Subaru started manufacturing a cheaper water pump with a stamped impeller. Crawford has a few tech docs that show the differences in flow between the two pumps. Hands down, the cast impeller outperforms the stamped one. You can still buy OEM cast impeller pumps for about the same price as a stamped one. With the additional volume and coolant line lengths in these conversions, it makes sense to me to go for the cast version.

IPB Image

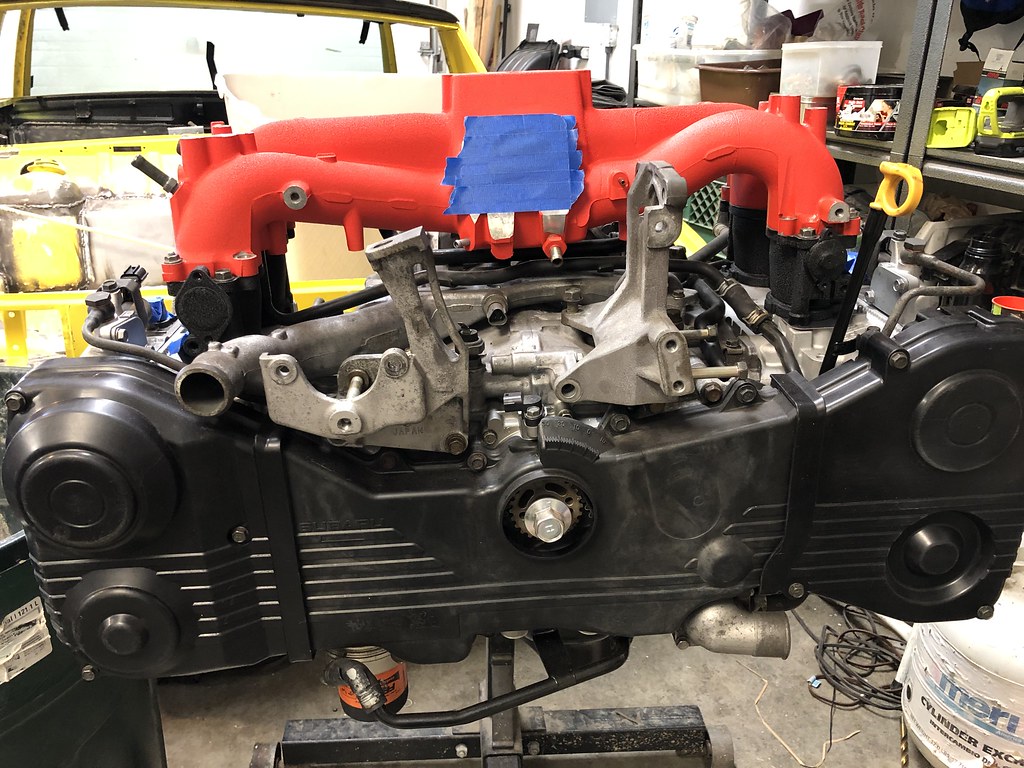
So, I got 2 cam seals, oil pan, oil cooler, tensioner, water pump, and one of the idlers installed. For some reason my gasket kit only had 2 cam seals, so I have to wait a few days for the others to show up.

IPB Image
oldschool
QUOTE(pploco @ Apr 8 2019, 08:39 AM) *

I started cutting back to find solid metal. Luckily, the long wasn't bad, and I probably cut more out of the inner fender well than I needed. There was definitely one annoying little corner in the firewall that was a booger to clean up.

IPB Image

It was nice to see that the inside of the long wasn't completely rotten. I probed with my chisel and body hammer and found a little spot at the bottom of the long.

IPB Image

But there was solid metal to work with. Sorry for the shady picture..

IPB Image

I was relieved to see some factory primer peeking through the sides and bottom. Once I vacuumed all the rust and flake out, it looked pretty good overall. I didn't get a good picture, but just in front of the firewall toward the front of the car is all factory primed metal. I'll have to open up the bottom and weld in a patch, but it should be minimal. My plan is to open it up, clean and scrape and then treat with phospho and some frame wax.

welcome.png ..wow I need to do that same job if you are using a chip board template please.
aktion035.gif save and sent to me.
pploco
Oh yeah, and some motor porn:

https://youtu.be/ZS4hDJLt5qU
pploco
[/quote]
welcome.png ..wow I need to do that same job if you are using a chip board template please.
aktion035.gif save and sent to me.
[/quote]

I'll check, but I think I tossed the template I made.
oldschool
[quote name='pploco' date='Apr 15 2019, 02:19 PM' post='2705528']
[/quote]
welcome.png ..wow I need to do that same job if you are using a chip board template please.
aktion035.gif save and sent to me.
[/quote]

I'll check, but I think I tossed the template I made.
[/quote]
No worries Thanks!
whitetwinturbo
QUOTE(oldschool @ Apr 15 2019, 01:45 PM) *

QUOTE(pploco @ Apr 8 2019, 08:39 AM) *

I started cutting back to find solid metal. Luckily, the long wasn't bad, and I probably cut more out of the inner fender well than I needed. There was definitely one annoying little corner in the firewall that was a booger to clean up.

IPB Image

It was nice to see that the inside of the long wasn't completely rotten. I probed with my chisel and body hammer and found a little spot at the bottom of the long.

IPB Image

But there was solid metal to work with. Sorry for the shady picture..

IPB Image

I was relieved to see some factory primer peeking through the sides and bottom. Once I vacuumed all the rust and flake out, it looked pretty good overall. I didn't get a good picture, but just in front of the firewall toward the front of the car is all factory primed metal. I'll have to open up the bottom and weld in a patch, but it should be minimal. My plan is to open it up, clean and scrape and then treat with phospho and some frame wax.

welcome.png ..wow I need to do that same job if you are using a chip board template please.
aktion035.gif save and sent to me.


barf.gif ........went and got a tetanus shot after reading and watching his build happy11.gif
pploco
Sorry, not many updates, I've been in India for a few weeks with work. I got home on Saturday and was in a half asleep coma for a couple of days with the jet lag. Travel to Asia can really suck but it pays for these types of projects. smile.gif

I did manage to get the timing belt, and the timing cover installed (twice) on my motor. In my jet lagged stupor, I got the timing covers on without putting the cam avcs caps on. So I had to pull it all back off and put the caps back on. Not a huge deal, but I'm glad I caught it.

I also pulled all the fuel lines, evap, and harness from the intake. I plan to strip the flaking paint off and repaint it.

I read through another thread and found that my coldwater cradle might put my suby trans a couple of inches too far forward. This creates too aggressive an angle for the CVs. Can anyone confirm this is accurate?
pploco
Got a call from Jeff at Autoventures LLC that my harness was finished and ready to be shipped. I'm pretty stoked about this - mostly because I didn't have to do the harness myself. I shopped around and found Jeff to be the best deal. They were great to work with and I would highly recommend them.

https://www.facebook.com/search/top/?q=auto...;epa=SEARCH_BOX

mepstein
QUOTE(pploco @ May 21 2019, 03:57 PM) *

Got a call from Jeff at Autoventures LLC that my harness was finished and ready to be shipped. I'm pretty stoked about this - mostly because I didn't have to do the harness myself. I shopped around and found Jeff to be the best deal. They were great to work with and I would highly recommend them.

https://www.facebook.com/search/top/?q=auto...;epa=SEARCH_BOX

Jeff Robenolt He did my suby harness. I agree with everything you said.
ConeDodger
Is this Renegade stuff?
mepstein
QUOTE(ConeDodger @ May 21 2019, 08:34 PM) *

Is this Renegade stuff?

Coldwater cradle.
Andyrew
cheer.gif
popcorn[1].gif
pploco
The defiling continues:

I got quite a bit done on the car last week. I decided to paint the chipped intake and try to get it back to the original red. NHT makes a wrinkle paint that is supposed to be tough as nails. So I put some chemical strip on the intake and brushed off the old paint. I hit it with some self etch primer and 3 or 4 thick coats of this stuff. I also did the TGV butterfly valve delete mod and painted the TGVs in black wrinkle.

IPB Image
IPB Image
IPB Image
IPB Image

It turned out pretty good, but I couldn't live with the nasty A/C and pwr steering bracket. so I painted those two and the DBW throttle body. Then I put the crusty exhaust, alternator, A/C compressor, and crank pulley back on for mock up. I'm definitely going to replace the exhaust manifold and crank pulley.

IPB Image

I also got the turbo set temporarily, the motor is off the stand and sitting on the cradle for some mock up. Now its time to work the transmission over.
pploco
I found another transmission that I couldn't pass up on. I had originally found a '99 impreza RS transmission to use, but after a bit of research realized that the push-type clutch, and the hydraulic conversion were a bit of a pain to get to work with the STI motor. So I picked up an '04 WRX tranmission with a broken center diff for cheap.

IPB Image

I pulled the nose cone off and disassembled the center diff. I expected to see it in bad shape, but it wasn't too bad. The little spacer on the spider gear had broken, but it hadn't done any major damage aside from locking the rear in. I guess I didn't realize that the WRX had a clutch pack in the center diff - it had definitely seen better days and went right in the trash.

IPB Image

So I thought I'd take a crack at making a center lock. I started following this write up, but realized that there are some differences in this transmission so it threw me off a bit.

The write up says to slice this:

IPB Image

then weld the inside sleeve to the outside sleeve, and cut the flange off -

IPB Image

IPB Image

You end up with this:

IPB Image


Here's my question. Why would you cut the flange off as it rides on the bearing that goes here?:

IPB Image

It seems like you would want to keep the sleeve on so it continues to sit on the bearing. The other question I have is if you use a cut sleeve (or use the Bremar spline locking spool) how do you prevent it moving backwards off the shafts?

Wouldn't it be better for me to do something like this?

IPB Image

Or just pull the spider gears and clutch pack out and weld here:

IPB Image

It would prevent the locked spool from moving laterally or horizontally and working its way off the splines??
pploco
I went back through each step and realized that you use the nut to keep it from backing out. I still think it needs to rest on the bearing to keep the shaft from moving up and down. Maybe I’m overthinking.
pploco
In yer face Bremar!

I had a couple of free hours last night, so I decided to take a crack at making a FWD locking spool out of a fooked WRX center diff. It was pretty straightforward and I was able to pull the little coupler off the shaft to tack in place. The welds penetrated pretty deep, so it should stay together (I hope it does). I put it back on with a lock washer and bent the little nut keepers back once I tightened it down. Here's to hoping it will withstand 300+ HP.

IPB Image

IPB Image

IPB Image

I thought I'd put the trans on the cradle and temporarily bolt it to the motor while I find some aluminum to make a back plate. I still need a clutch, but I can start mocking things in now.

IPB Image

Oh the bad things I'm going to do to this drive train....
pploco
I spent a few days in the garage this weekend on the conversion. At Chi-town's suggestion, I pulled the coupler back out and squared it off and rewelded; then put it back in with some locktite.

IPB Image

IPB Image

My son called me a chicken for not attempting a back plate. So I went salvaging and found a 12"X12"X1/2" plate for 20 bucks. After two sawzall blades, three cutoff wheels, and a skinned knuckle, I managed to get one that looked half decent. My son says its the perfect spot for a mighty mouse sticker - we'll see about that....

IPB Image

I got the transmission mounted, and bolted everything to the car. Then I laid on the garage floor for about an hour afterwards. Whew, that was a wrestling match.

IPB Image

IPB Image

And there's room to spare

IPB Image

I've still got to figure out some better motor mounts. The stock mounts let the cradle hang too far down. And with the stock STI mounts, I'm not going to really need the rubber Porsche mounts. My plan is to have something fabbed up with urethane - dunno, I'll cross that bridge later. For now, the motor and trans are set so I can start mocking up coolant and clutch lines, intercooler, and axles. This felt like a big milestone. aktion035.gif
pploco
I decided to take a shot at some DIY urethane motor mounts. The stock STI mounts keep the engine a few inches higher on the cradle so the oil pan doesn't hang down too low. I have plenty of clearance on the top of the motor.

I started by taking the cracked and brittle Porsche motor mounts and hit them with the torch to get the center bushing out. After a bit of cleanup and trimming:

IPB Image

Here's what I'm left with:

IPB Image

IPB Image

IPB Image

IPB Image

They sell a coloring agent to make these more purdee, but I didn't want to pay the extra 20 bucks. I created a mold with some cardboard and aluminum tubing. The trick was getting a non binding agent like WD40 or candle wax (which is what I used) on the surfaces I didn't want this rubber to stick to. Hot glue was used to seal everything, and I poured the compound into the mold. 18 hours later, I'm left with this:

IPB Image

This stuff is solid - it feels almost like a skateboard wheel.

IPB Image

These are the perfect height now - kinda cool.

I also spent some time getting the radiator mocked in. I've got to do a bit of trimming to get the radiator inlet to clear some of the metal in the frunk - not a big deal. I picked up some rubber grommets on Amazon. My plan is to build some cribbing that holds the radiator with these upper and lower grommets, then I'll have something to rivet some aluminum sheeting to for ducting. I want to keep the radiator as far forward as possible, while allowing enough space for an A/C condenser and intercooler heat exchanger - and having enough space on the top so the hood can close.

IPB Image
IPB Image
IPB Image
pploco
With the 4 day weekend and perfect weather, I had to take a break from work, put the 914 project on hold for a bit, and chase my 2nd passion. I took my son and a couple of his friends up into the Whiteclouds to enjoy a little backpacking and fishing in some of the most beautiful country on earth.

Summers in Idaho mean backpacking for my son and me. This trip, we started at the 4th of July Lake trailhead, made our way into Ant's basin, climbed Devil's Staircase (more like Satan's rickety ladder if you ask me) up over 10K feet, dropped into Cornice lake, and made our way down into Quiet lake for a couple nights. The scenery and fishing were spectacular. I couldn't believe how much snow is still up there. Luckily Quiet wasn't iced over as were some of the higher lakes.

We hiked back out over Patterson's peak for an incredible view of the Whiteclouds and Sawtooth's to the west. This is definitely a do-over trip - as soon as my legs stop aching. We pulled about 18 miles in total, but the elevation changes made it feel like 50. What a great way to spend a few days.


Looking out over Ant's Basin to the north.
IPB Image

Approaching Devil's Staircase - from the base to the top (called "Windy Devil) is only about 1/2 mile - but it took a good three hours to climb.
IPB Image

The north side of Windy Devil. Just over my head you can see the snow bank we had to slide down before climbing down the steep scree. That's Cornice lake (mostly frozen) to my left.
IPB Image

The descent to Quiet lake from Cornice. Castle Peak is in the background.
IPB Image

Quiet Lake
IPB Image
IPB Image
IPB Image
IPB Image

View of Castle Peak from Patterson's Peak on our way out.
IPB Image

View of the Sawtooth's to the west from Patterson's
IPB Image
pploco
I spent a lot of time on the 914 this weekend. I'm currently working on the radiator (more pics to come). I've got the radiator cradle and shroud almost complete, but I wondered what A/C exchanger/condensor would work best with the Celica GT radiator and 914 sizing. Anyone have any recommendations?

IPB Image
IPB Image
Chi-town
I'd probably look at the Celica gt unit as your radiator probably already has the mounting for it?
pploco
The Celica condenser is 26X13.75 which is about an inch taller than the radiator - for some weird reason. I’ve never looked closely at the GT setup, but I built this cradle thinking that the condenser would be about the same dimensions as the radiator core - wrong. I also fabbed the whole works as far forward as possible without interfering with the hood, so there’s not a lot of head room. Long story short, I’d probably have to start over to get it to fit. I’ll probably have to suck it up and buy a restomod universal one.

I see a few cheap parallel condensers on flea bay that would fit, I wonder if they are worth trying.
pploco
Here are a couple that would fit the dimensions:

Subaru Legacy (2010+) - 24 1/2 X 12 3/8
Land Rover (2002+) - 11 3/4 X 25
Subaru Forester & Crosstrek (2009+) - 11 3/4 X 25 1/8
VW Eurovan (1993+) 11 7/8 X 26
Mazda Mazdaspeed (2006) - 12 1/2 X 24 13/16

I'll go the Subaru Legacy route I think. It would make the hoses much easier to make, and keep things compatible with the Subaru motor.
pploco
Here's what I ended up going with. I love Summit. I ordered this on Monday afternoon and it was on my doorstep Tuesday morning, and had it installed by Tuesday evening.

IPB Image

IPB Image

IPB Image

IPB Image
76-914
That will work. Any size that fits your opening will work. The 914 is a small cabin to cool so any small condenser will do. Your going to love having AC. beerchug.gif
pploco
Things I still need to do up front:
1. Mount the water/air heat exchanger
2. Shroud the top
3. Paint the radiator/condenser crib
4. Run the coolant, A/C, and water/air IC lines

I should have the shrouding and painting done this week. I then plan to start running the coolant lines and the A/C and water/air return lines under the console. The a/c and water/air feed lines will be run under the rocker or under the car (still haven't decided).
pploco
Here are a few more pictures of the radiator/condenser setup:

IPB Image
IPB Image
IPB Image
IPB Image

Next up is the shrouding. I've got the side figured out, the top should be pretty straightforward, but the bottom is going to be a puzzle. Any idears?
pploco
I got a full day in on the car this weekend. I had a daughter head off to college a few weeks ago, so garage time has been non-existent. Now that things are slowing down a bit, I hope to get back at this to get some regular progress going. I finished the radiator, A/C condenser and water/air IC exchanger - got all the shrouding done and sealed. I cleaned things up a bit in the frunk, and I'm ready to move to something else.

I still need to run the lines, but I plan to run the coolant lines through the center console, so I decided to hit the floor pan and see what I was working with.

First off - got the radiator a/c cradle painted. I picked up a nutsert rivet tool that is pretty magical, so I may have gone a bit nuts with it (no pun intended) - but man its such a great tool!

IPB Image

All assembled, painted, and sealed. I even hooked up a battery to the fans to test the flow - it definitely moves a lot of air.

IPB Image

I'm torn on venting the frunk. I like the idea of a stock looking sleeper, but I just can't bring myself to cutting massive holes in the inner fenders yet. I'm starting to wonder if a hood vent might be better for structure - it seems you would really weaken the front of a car that already flexes quite a bit. Now I can already hear the purists groaning about cutting holes in perfectly good hoods, but my thinking is that a hood is much easier to repair/replace than inner fender wells. I don't know... I think I'll save this decisions for a future day.

With the radiator done, I moved to the interior to see about running coolant and maybe water/air lines under the console. I've got a plan hatching to cut the top off the tunnel, clean up the rust, rearrange the fuel, brake lines and add in coolant, shifter cable. But I wanted to see what I was working with. I know there are a couple of spots to do some rust repair on.

Ode to favorite tools number two - the scaler or needler = pure magic on the tar covering. Stripping most of the tar from the pans took no more than an hour. Before getting the wirewheel or putty knife - go grab one of these for 20 bucks at HF. There is nothing more satisfying than watching huge chunks of the tar peel off with little effort.

IPB Image

IPB Image

There were three areas needing rust repair. Thankfully, only one was in the pan. There's a small spot under the passenger seat that should be pretty simple, then a spot at the base of the passenger toe kick, and a small spot in the firewall behind the driver seat. All in all, much better than I had thought originally.

I also pulled the windshield out to see how bad the bottom corners were behind the seals. Thankfully, nothing major..

IPB Image


76-914
popcorn[1].gif
This is a "lo-fi" version of our main content. To view the full version with more information, formatting and images, please click here.
Invision Power Board © 2001-2024 Invision Power Services, Inc.